

Websphere Silent Installation
Websphere Silent installation consists oof 3 stages. You need to successfully complete all of these.
- Base installation
- IBM Http server
- Plugin Software installation
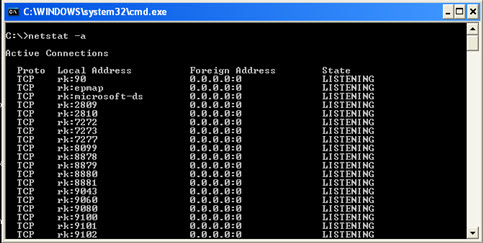
The command “netstat –a” is used to find out the port numbers which are being used.
Silent Installation of Base
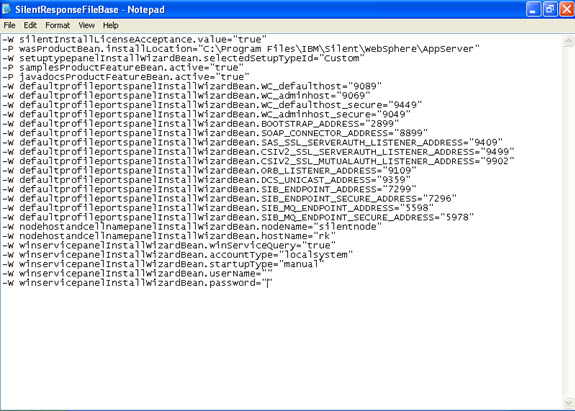
Go to the software 6.0 base/WAS. In the WAS console there will be a file named responsefile.base. Open it using editor.
Hints: node name can be any name
Check the port numbers, it should not be repeated.
The host name happens to be the name of the computer
-W nodehostandcellnamepanelInstallWizardBean.hostName=”rk”,
Prepare the silent response file as follows.
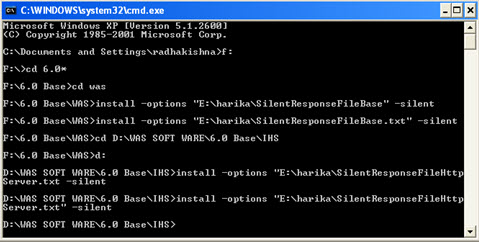
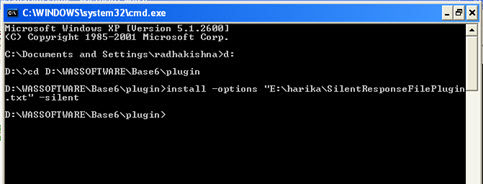
Now go to the command prompt and to the software where home is installed and type the following command:
WAS >install –options “the response file address.txt” –silent

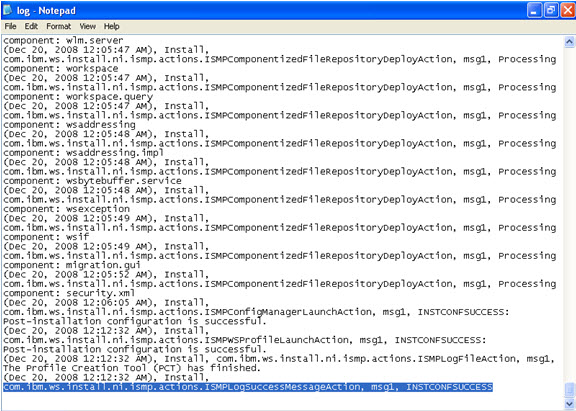
Now in the log file of the logs folder, the following message should appear:
com.ibm.ws.install.ni.ismp.actions.ISMPLogSuccessMessageAction, msg1, INSTCONFSUCCESS

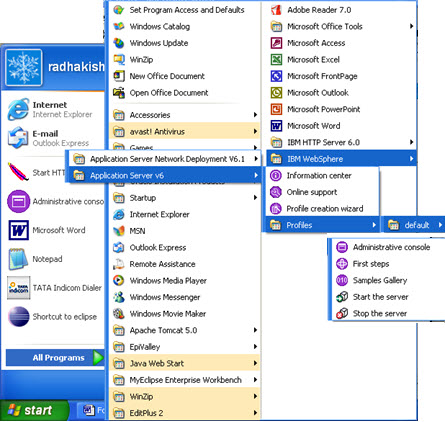
Also check that in the program files, entry of the Application server base is also Added V6.
Silent install of IBM HTTP SERVER:
Locate response file .6.0/base/response file. Now open response file, and copy the required commands from the response file, and save the response file.
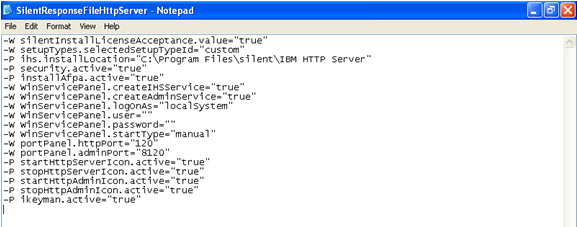
Here, I have changed the port numbers, so be careful with the port numbers. If the port numbers are being used, then there will be a problem in the installation.
\Go to the command prompt and issue the following command:
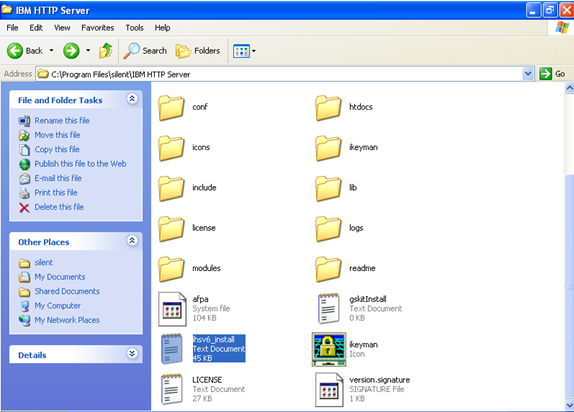
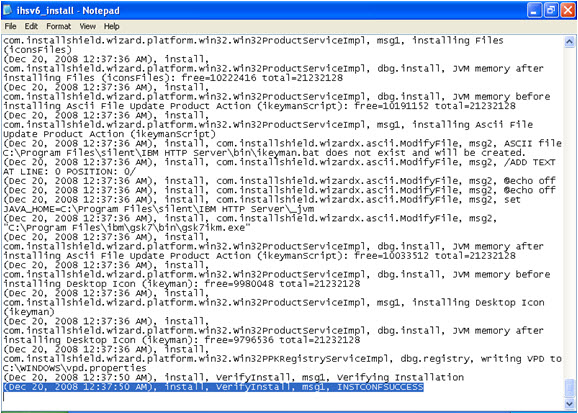
As per location mentioned in silent response file , check whether the server is being installed or not. In install folder, check for the following file “insv_install”.
In the insv_install file, the following message should appear: (%DATE%), install, VerifyInstall, msg1, INSTCONFSUCCESS
Also check in the program files whether the new entry of IBM http server is made.
Plugin Software Silent Installation
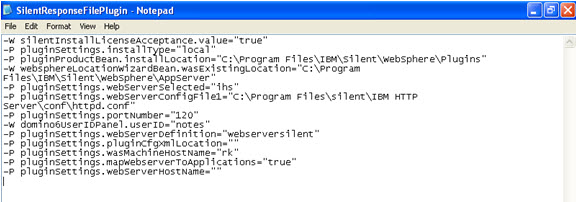
Go to the plugin folder, find the response file, and create your response file similarly.
For the location of the Application server, be careful while selecting the location. For example in the silent installation, I had used this following location of the server, so I am providing the same for the plugin software installation.
-W websphereLocationWizardBean.wasExistingLocation=”C:\Program Files\IBM\Silent\WebSphere\AppServer”
WAS MACHINE host name is the system name.
-P pluginSettings.wasMachineHostName=”rk”
Also check the port number that is being used here. I am using the same port number that I have used earlier for the silent installation of the server. The response file is as follows:
Go to the command prompt and go to the location of the software, and type the command as follows:
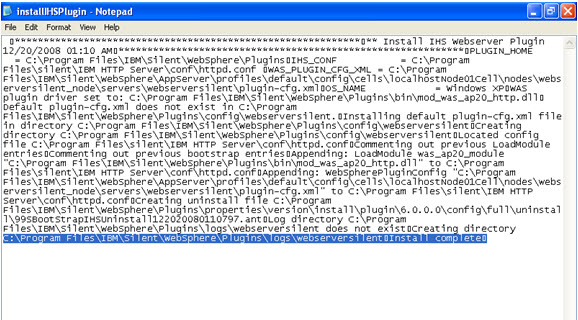
Correspondingly check at the location mentioned in the response file whether the plugin is being installed or not. Now go to the install folder in the specified location as follows:
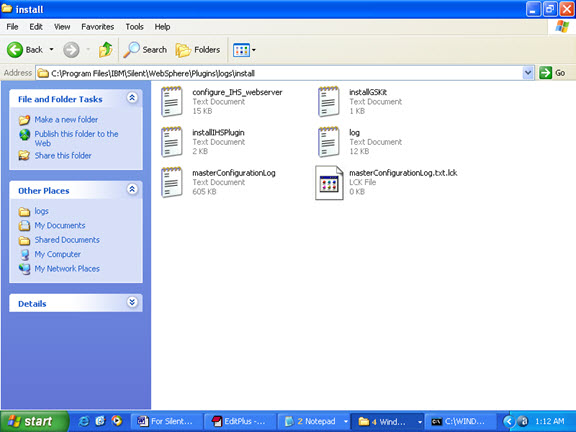
Check the text file install-HSPlugin. It must say the install complete.
Leave a Reply
You must be logged in to post a comment.
I have tested this on one my websphere server today , everything went well. Use it if you need it.
Small Caveat:
The above script starts services as root . At many places you may not hvae root privs to stop/kill DMGR, Nodeagent and JVM processes.
To start services by respective WAS user (was61) edit script and add following option
sudo -u was61 -c “$WAS_HOME/dmgr/bin/startManager.sh”
sudo -u was61 -c $WAS_HOME/Node/bin/start_nodeagent.sh
sudo -u was61 -c $WAS_HOME/Node/bin/start_server_member1.sh
sudo -u was61 -c $WAS_HOME/Node/bin/start_server_member2.sh