

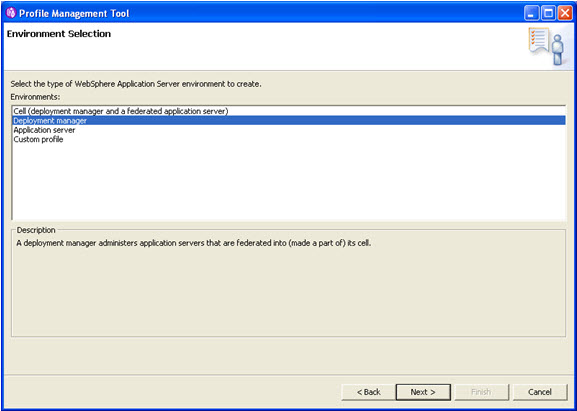
Websphere ND Install under Windows :Create DMGR, AppServer profile
Let’s start network deployment install, Click on the launchpad.exe
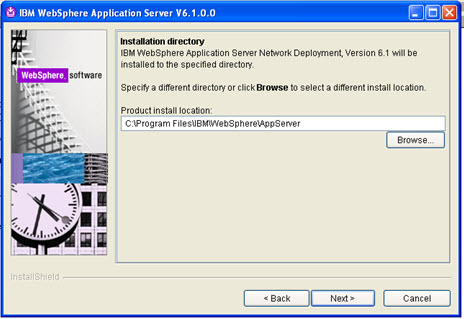
Next
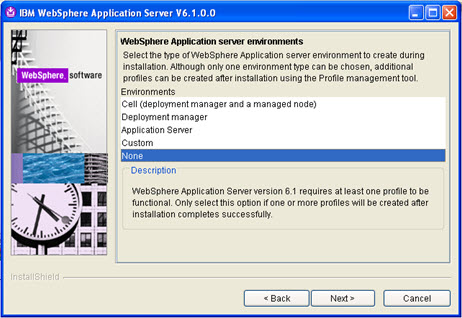
Select none. Installation carries on…..
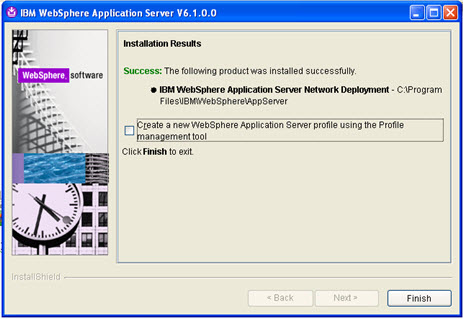
Uncheck the check box as shown in the following figure. And you will be able to create the deployment manager profile using Profile creation tool.
To open the profile creation tool from the command prompt
D:\Program Files\IBM\WebSphere\AppServer\bin\ProfileManagement/pmt
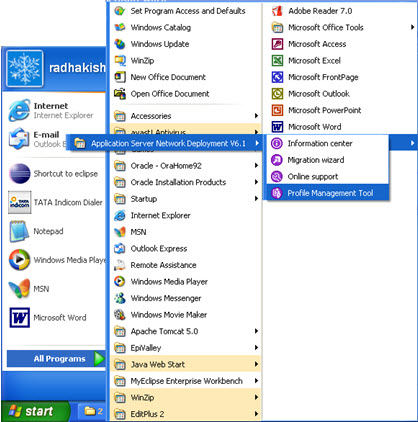
2. Go to program files and profile management tool as follows:
And create a deployment manager profile first.
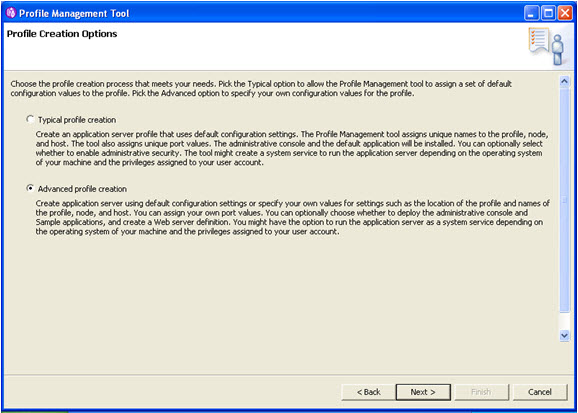
Select advanced profile creation.

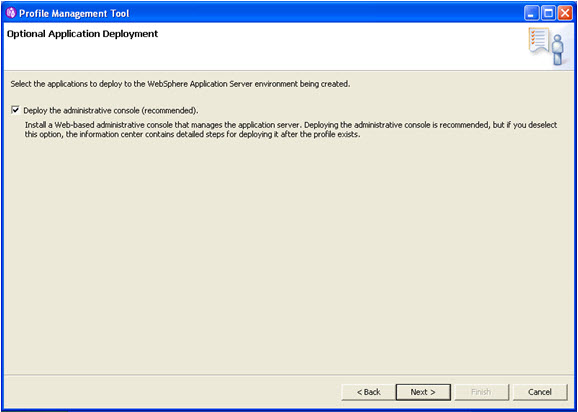
Select deploy administration console and click on next.
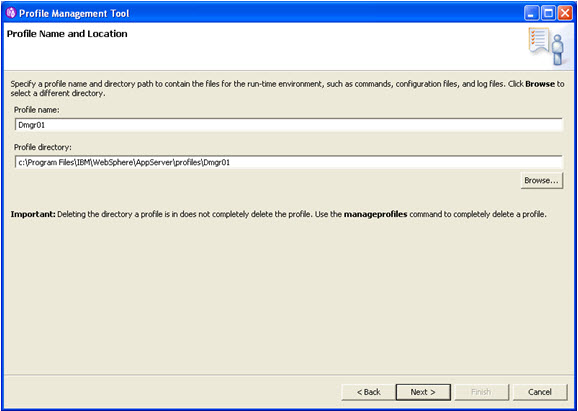
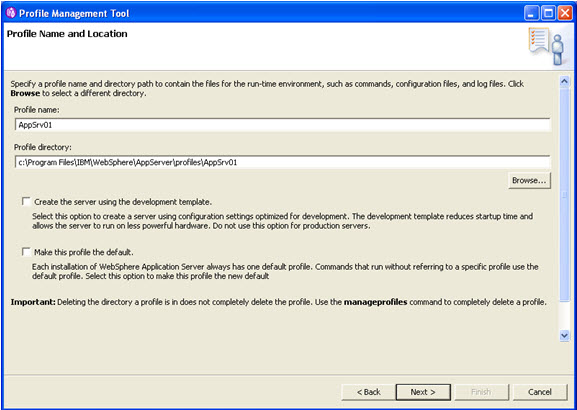
Specify profile name and directory and click on next.
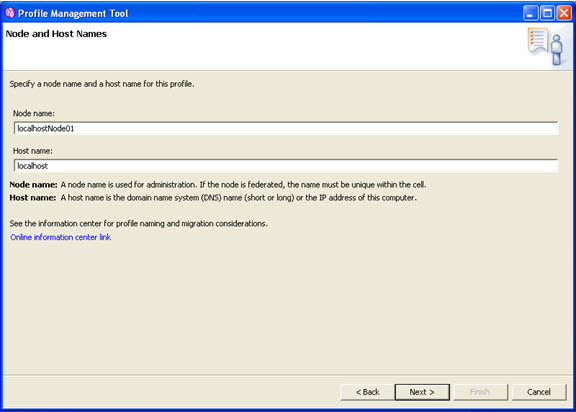
Specify the node name, host name and the cell name and click on next.
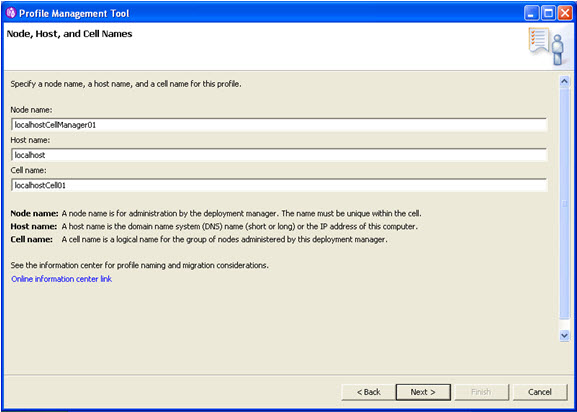
The above figure depicts the following:
- Node name you can change if you want.
- Host name is the local host as you are using only one machine
- Cell name you can change if you want
- Node name and cell name can be changed, but host name is the name of the system.
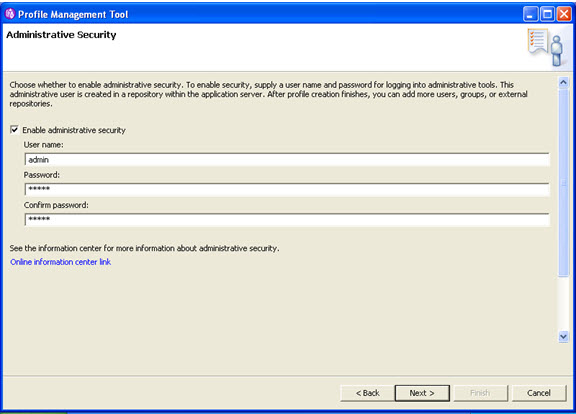
Username: admin
Password: admin
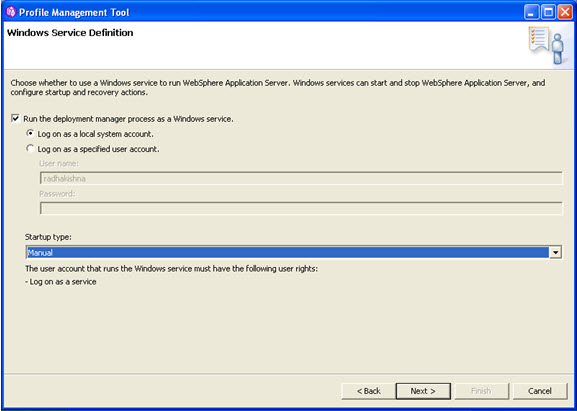
Select start up type as manual.
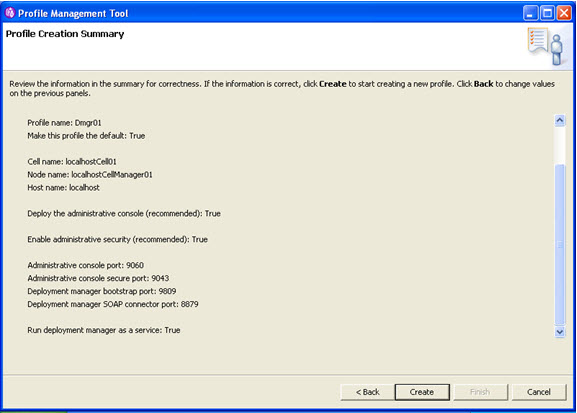
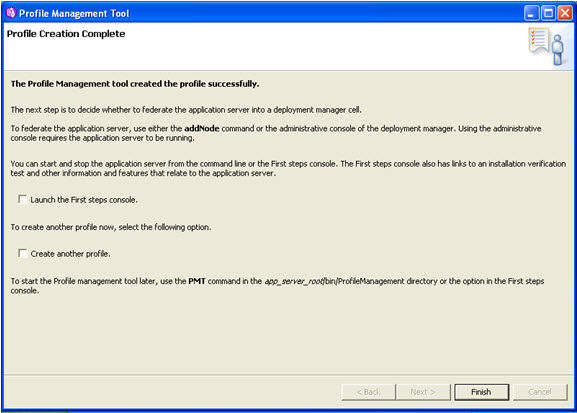
Click on create, the profile Dmgr01 is being created.
Now only we are not launching the first step console.
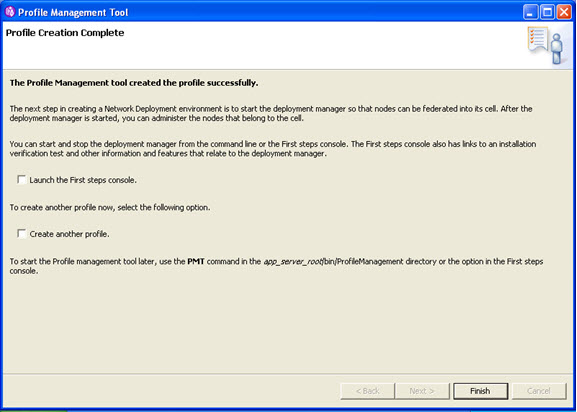
Click on finish.
Now the deployment manager profile is created.
To check the installation verification test manually.
D:\Program Files\IBM\WebSphere\AppServer\profiles\Dmgr01\bin>ivt dmgr Dmgr01
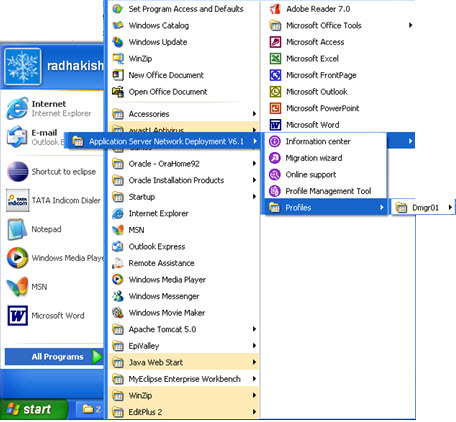
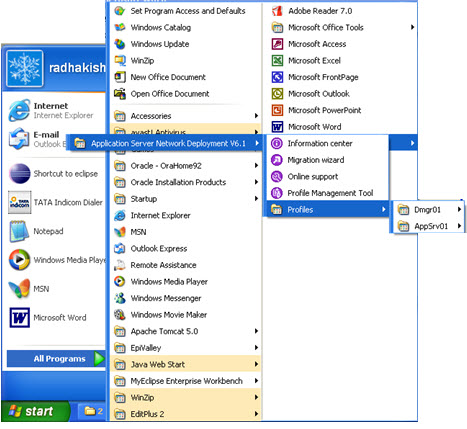
Now the profile Dmgr01 is created.
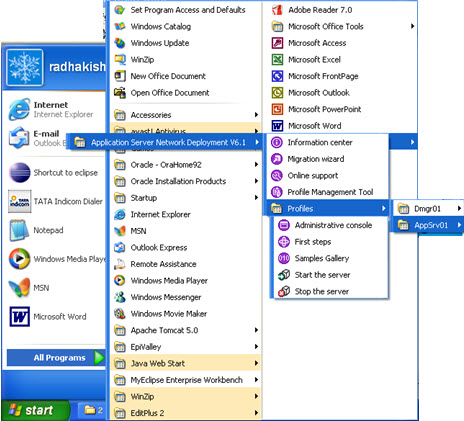
See the options of the Dmgr01 profile.
3. Now we are going to create the Application Server Profile. Click on the profile Management tool.Select Application Server.
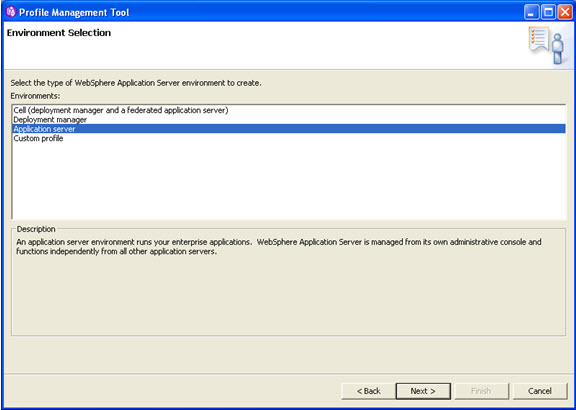
Select advance profile creation and click on next.
Select the three checkboxes and click on next.

Specify the profile name and directory and click on next.
Specify the node name and the host name and click on next.
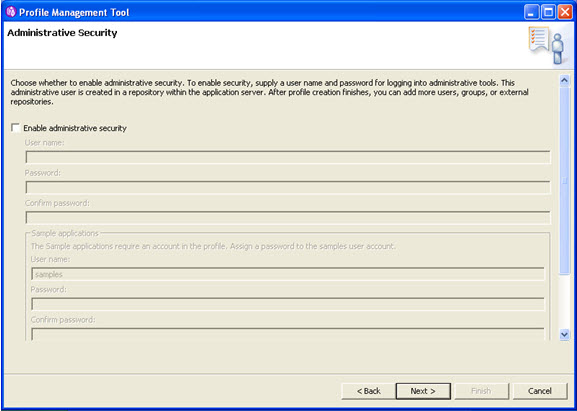
We are not using security as of now.
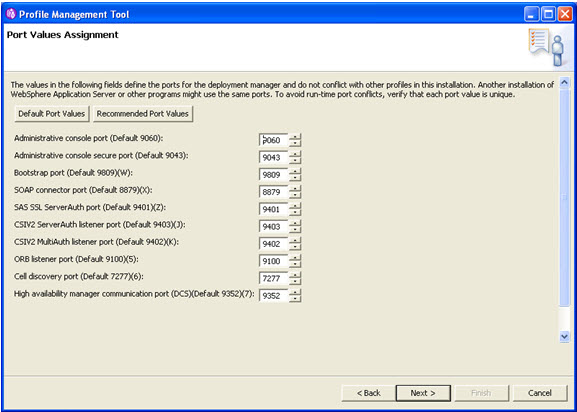
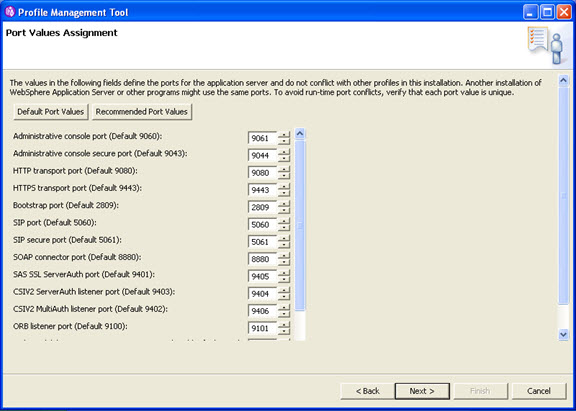
Specify the ports and click on next.
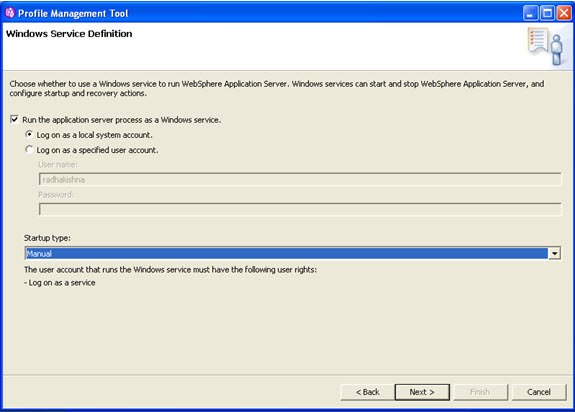
Select “Run the application server process as a Windows service” and click on the next button.
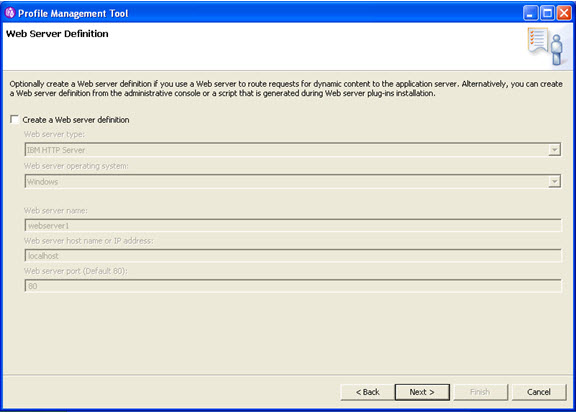
Do not create a web definition. Click on next.
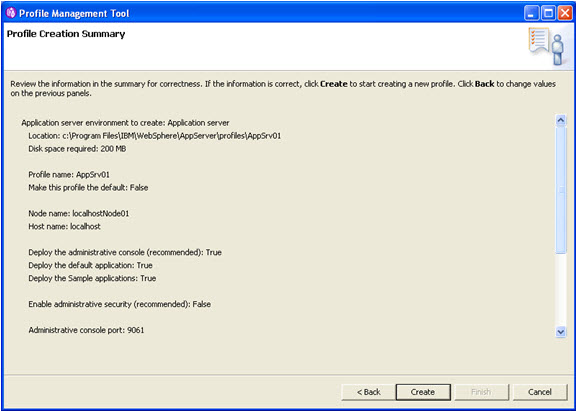
Click on create.
We are not launching the first step console now.
Now in the profiles you can check application server profile is also created.
For the installation verification test at the command prompt
D:\Program Files\IBM\WebSphere\AppServer\profiles\AppSrv01\bin>ivt server1 AppSrv01
ivt server1 AppSrv01 -> server1 is the name of the server , and AppSrv01 is the name of the profile.
The name of the server is present in this location:
D:\Program Files\IBM\WebSphere\AppServer\profiles\AppSrv01\config\cells\localhostNode01Cell\nodes\localhostNode01\servers
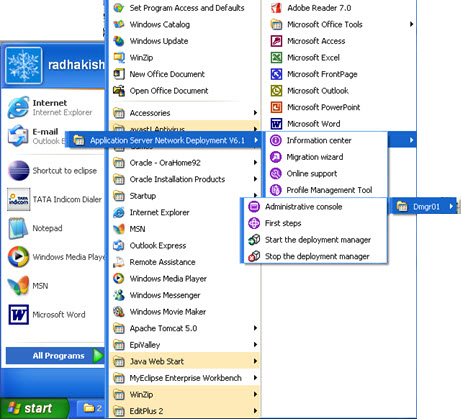
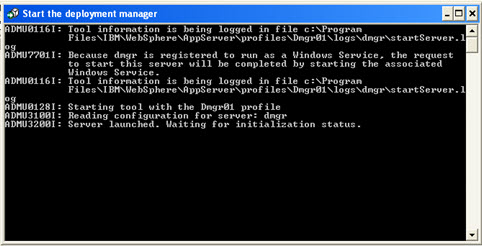
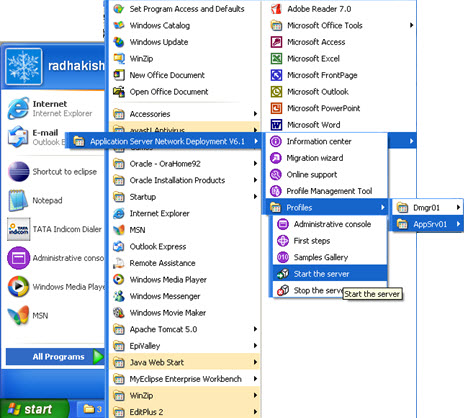
NowFirst start the deployment manager and then the admin console of Deployment Manager Profile.
Go to program files -> Ibm websphere
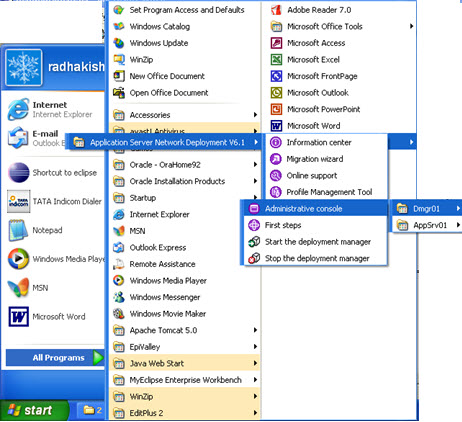
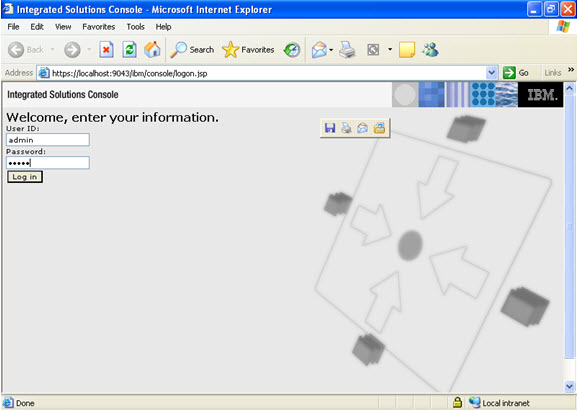
Now first start the deployment manager, then start the Administrative console.
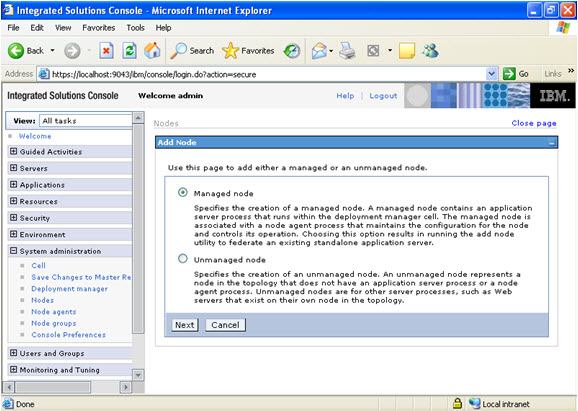
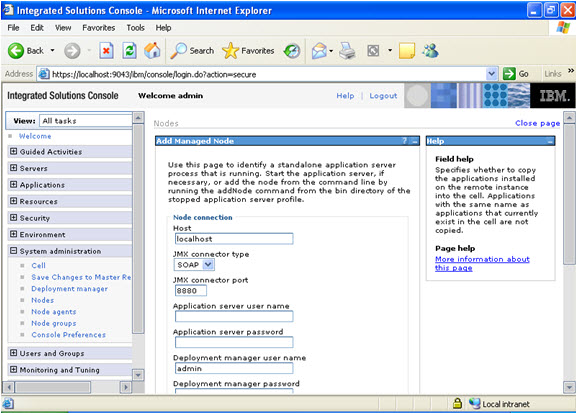
Click on System administration, node, add node.
Select managed node.
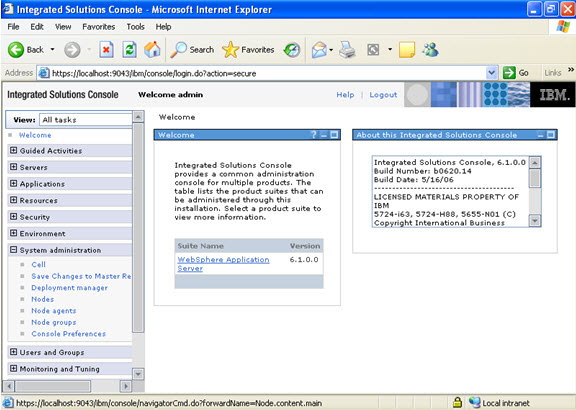
Remember now you are in the Deployment manager profile Administrative console.
Now to add the node, you go to the profiles.
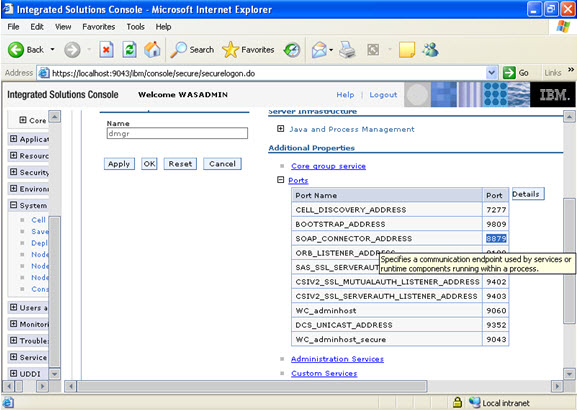
Serverindex.xml file. Is present in the following location
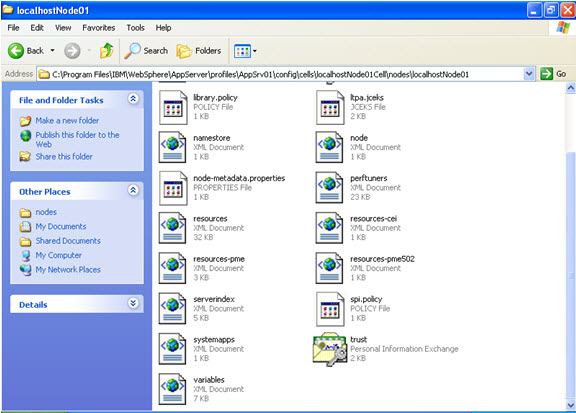
In the serverindex.xml file check for the SOAP_CONNECTOR ADDRESS ,
Note: The port no in this case is 8880 and the ORB_LISTENER_ADDRESS, in this case is 9101
Submit the following details as follows in the add node screen.
Note: If the jmx connector type in the following figure is not SOAP AND you have selected RMI/IIOP then you have to use the ORB_LISTENER_ADDRESS port no.

Note: now start the server and click on ok.
After the server is started, then click on ok.
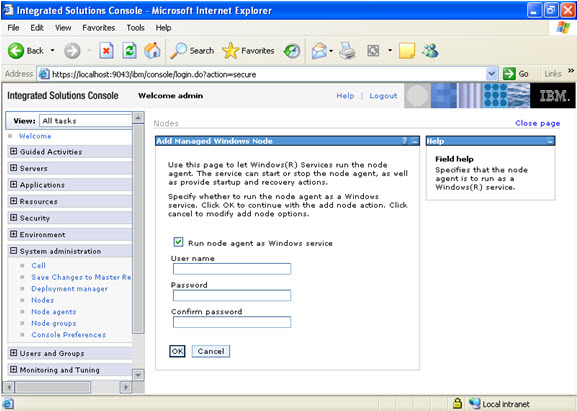
Check on run node as windows service.

Now the node is successfully added. You should log out and just login in again to see the new node
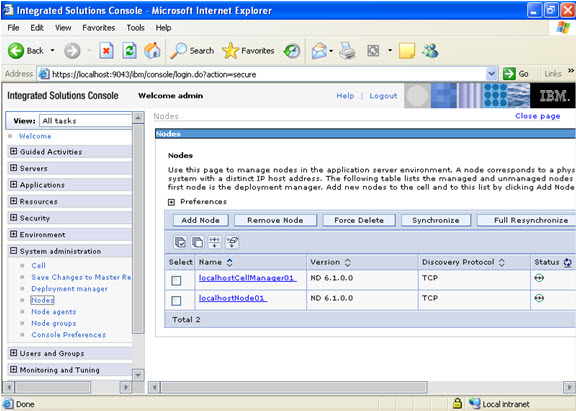
The new node added is shown.
To addNode from using the command prompt:Go to the command prompt,Application server/profiles/appsrv02/bin >addNode localhost 8879
8879 is the SOAP PORT ADDRESS OF THE DEPLOYMENT MANAGER.
To include applications use –includeapps
Note: also note that in the bin directory of the Deployment Manager, there is no utility addNode.
Leave a Reply
You must be logged in to post a comment.